Support
> Customising Appearance > How to add Categories to break up Filters into groupsHow to add Categories to break up Filters into groups
If you've got a lot of Filters in your locator then organising your Filters by Category can be used to break up large lists of Filters into groups so that your visitors can select a Filter Category first and then choose from Filters in that Category reducing information overload if too many Filters are presented at once.
Let's start with an example. Say you have 5 different brands with 10 products in each brand. Using just Filters, you'd need 50 filters which would be quite overwhelming to ask your visitors to choose from. Instead, you can add Category for each brand and when the visitor chooses a Category they are only shown the Filters within that category.
Here's how this will look before a Category is selected:

And after we've chosen a category, the Filters available in that Category are shown:

You could also use checkboxes to select the Category instead as shown below. This allows the visitor to select more than one Category at a time:

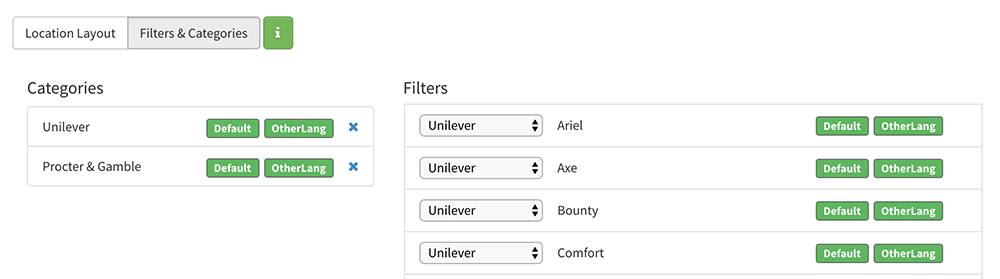
To get started creating Categories in your locator, visit the Filters page in your admin console and click on 'Add Category' to add your first category.
Once you've added the Categories, you can then assign each Filter to a Category by choosing the Category name from the dropdown list on the left. The below image shows how we configured this for the Category and Filter layout above: